Roll On!*
*DISCLAIMER: This blog entry is not to promote smoking or to inspire anyone to do so. Your life is your responsibility.
Let it roll, baby, roll.
Let it roll, baby, roll.
Let it roll, baby, roll.
Let it roll, all night long.
Or so 'The Doors' sang a few decades back. Back, when there were no severe duties on tobacco products and smoking was not something looked down upon. As we know, those were the days!
Coming to UK, I was hit most by the cigarette prices, from the Park Street, Kolkata, WIN fags for INR 20 (£ 0.25) to a packet here for £6 (~INR 400) has been quite a dent in my wallet. Till I can source some duty-free tobacco, I thought about rolling my own. Now, I have tried this earlier and never been any good at this. And, so enters _drums roll_ the 'Rolling Machine'. This blog is a step-by-step instruction to using one. So, read on if you wanna roll your own!
Step 1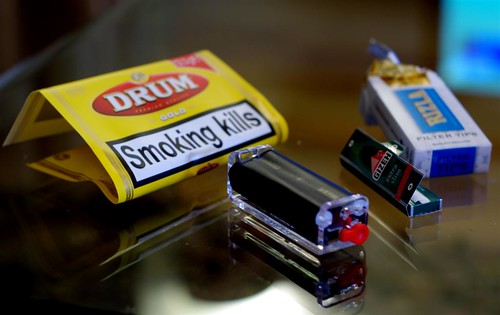
TOC.
What you need to get started:
Step 2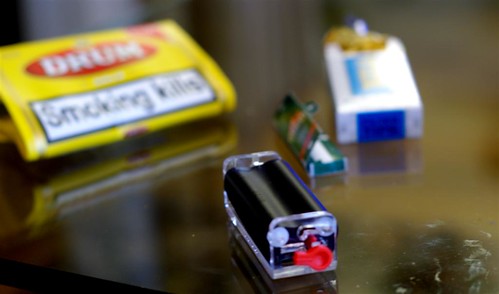
Open.
The roller has two positions - open and close. In this photo, the roller is in the 'open' position, ie. you can put in the tobacco. You will understand the difference when you see the 'close' position. The red lever allows you to roll Ultra Slims if you so want!
Step 3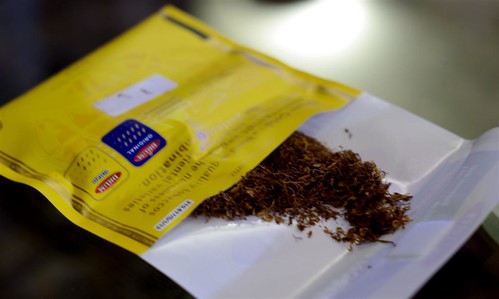
Tambaku.
Time to get the tobacco out. I wouldn't recommend DRUM as this is the only one I have tried. It's not as mild as I would have liked it to be.
Step 4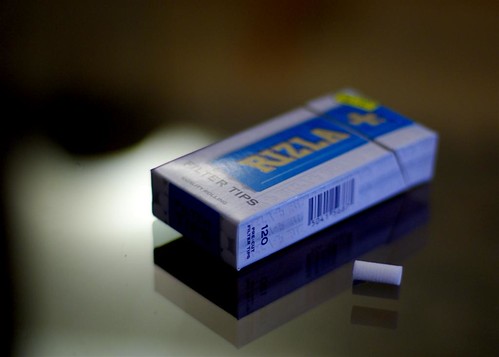
Tipped.
Take out a filter tip from the packet. There are loads (120 to be exact) to last you a few weeks.
Step 5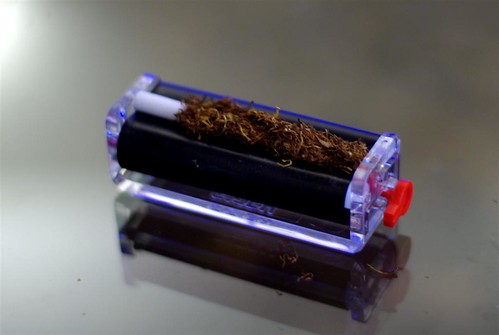
Layoff.
Just spread the tobacco on the roller with the filter tip at one end. Be careful not to put in too much tobacco. I did that the first time, and the tobacco didn't burn easily.
Step 6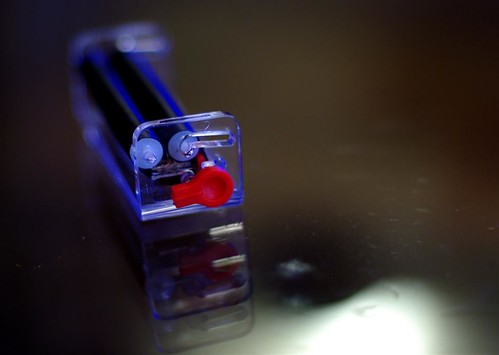
Close.
This is what is called the 'Close' position. Just slide one of the arms close to the other one. The arms fixes into a slot and is ready to be 'rolled'.
Step 7
Intruder.
Slide the paper in the crease with the sticky side up and begin to roll the paper into the machine.
Step 8
Licked.
Lick the sticky part, continue rolling. Holla.
Step 9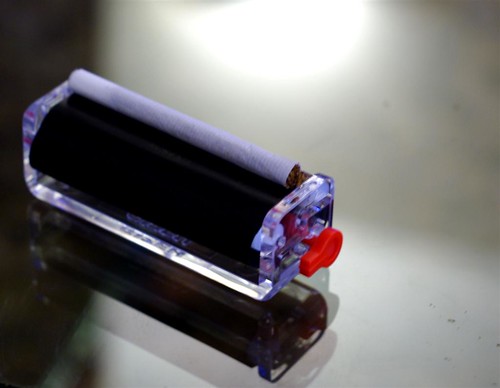
Reddy.
Separate the two arms. Lo and Behold! Your cigarette is ready to smoke.
Step 10
Rush.
Now, either go out to the balcony or as some of my friends suggest, turn off the smoke detector - light up and enjoy! :)
All images are protected under:
The Rolling Machine by
Gautam Prakash is licensed under a
Creative Commons Attribution-Noncommercial-No Derivative Works 2.5 India License.